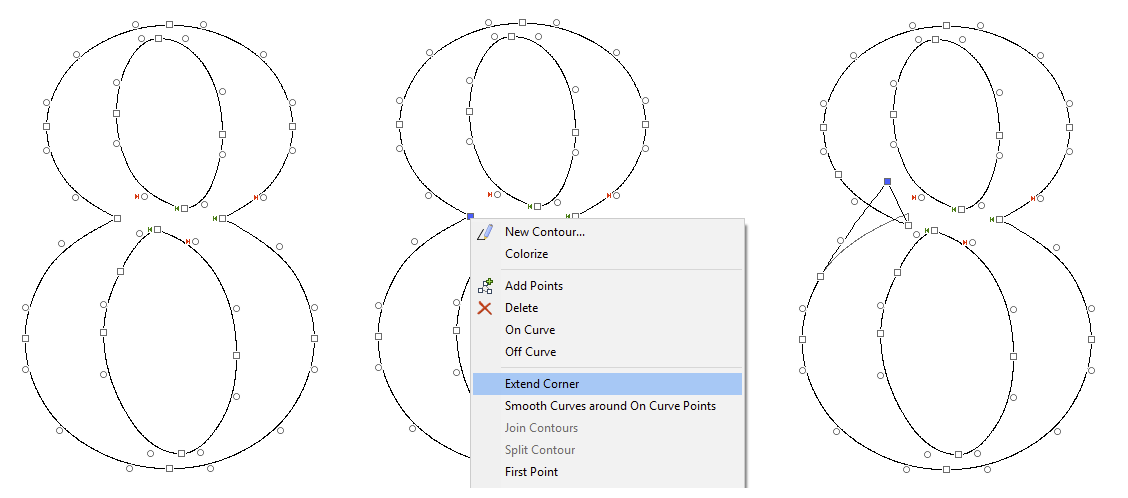
In Point mode the rectangles and the larger green circles represent on-curve points. The rectangles represent corners, while the large green circles indicate the curve is smooth. The smaller circles are off-curve points. Such off-curve points are also known as handles or control points.
There are several operations related to points (move, add, delete, change points to on or off-curve, etc.). Select one or more points and then right-click one of them to open a submenu with even more point related features.
Every contour has a start point with a green mark and an end point with a red mark. To change the start point, right-click a point and select First Point, or use the shortcut "Shift+F". In a cubic contour the start point is always an on-curve point.
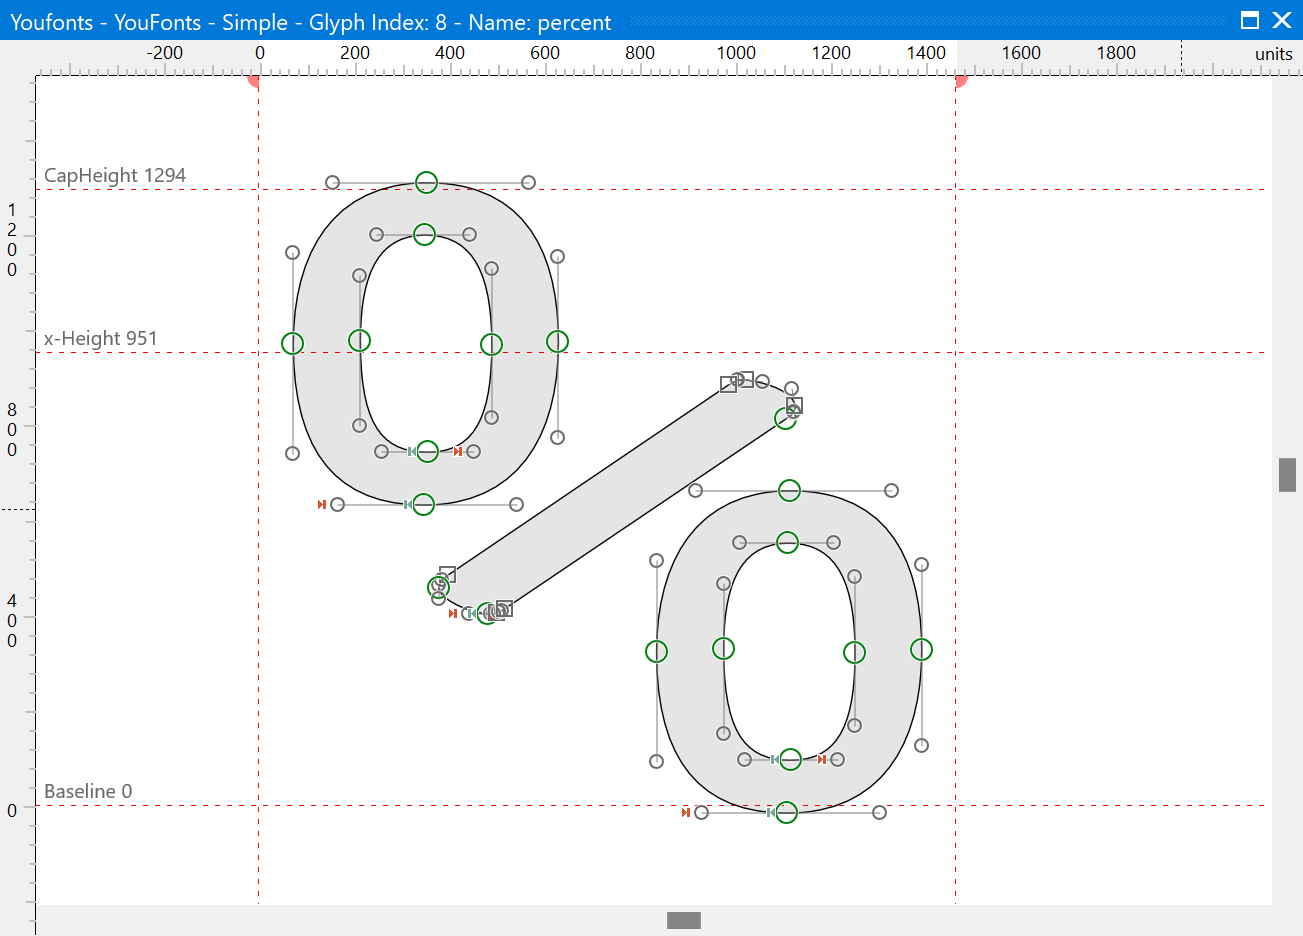
Change Curve Segments
To change a curve, drag the curve segment to the desired position.
Click a segment to select its two end points; hold Shift to add them to the selection. To divide a segment into two segments, double-click it: a new point is inserted where you double-clicked.
Select Points
To select a single point click on it. To select more than one point hold down the Shift key while clicking on several points or another way is to hold down the left mouse button and drag a rectangle around the points you want to select simultaneously, whether a few or all points in the glyph. Use the Ctrl-A shortcut or select Select All from the Edit menu to select all points. Hold down the Shift key and select points you want to add or remove from the current selection.
The status bar shows context specific information, so in point mode it will show the mutual x and/or y position of the selected point(s) coordinate(s). Depending on the number of points selected it might also show angle (with a single point) or distance (between two selected points).
A selection survives switching between point mode and contour mode: select a few points, switch to contour mode and back, and the same points are selected again. Commands that apply to the whole glyph when nothing is selected (Transform, Remove Overlap, Optimize, Round Coordinates and the like) no longer change your selection, and Undo or Redo of a point edit switches the editor back to point mode and shows what it restored.
Move Selected Points
You can select one or more points to move them around. With cubic curves, the handles (off-curve points) of a moved on-curve point move along with it, also at a corner between a straight segment and a curve.
To constrain a selection so it moves only horizontally or vertically, press Shift as you drag the selection. When you drag a single handle with Shift, the handle keeps its angle and only its length changes.
Press Alt to ignore the snap to grid and snap to guidelines features. With cubic curves, Alt also keeps a dragged on-curve point on the line between its two handles, so it slides along them and the curve stays smooth.
The arrow keys move the selection 1 funit, with Shift 10 funits and with Ctrl (Cmd on macOS) 100 funits; Alt with an arrow key slides on-curve points along their handles. To use the steps of earlier versions (10 funits, Ctrl 1, Shift 100), turn on Classic arrow key steps in the Options dialog.
FontCreator will try to maintain smooth cubic curves: when you move a handle of a smooth point, the opposite handle turns along and keeps its own length. You can override this by holding down Ctrl (Cmd on macOS) while moving selected points. FontCreator will then no longer keep smooth curves smooth, thus when you move a single off-curve point which used to be part of a smooth curve, then the opposite off-curve point will no longer move along. With Ctrl, the handles of a moved on-curve point stay where they are.
There are some more advanced options which also only work with cubic curves:
While holding down Ctrl along with Shift, FontCreator will try to make all selected curves smooth.
While holding down Ctrl along with Alt, FontCreator will try to make all selected curves symmetrical.
Delete Selected Points
You can delete part of a contour by selecting one or more points and pressing the Delete or Backspace key, or by selecting Delete from the Edit menu. FontCreator keeps the remaining contour as close as possible to the original contour. If you are deleting part of a cubic curve, adjacent handles are deleted as well, so the remaining contour is still a valid cubic-based outline.
To open a contour at the selected node instead, press Shift+Delete or Shift+Backspace.
Scale Selected Points
You can scale by first selecting several points and then click on one of those selected points again (don’t double-click). Alternatively press Key S to toggle between Move and Scale mode.
Smooth Curves
To guarantee smoothness, the on-curve point at which two curves meet must be on the line between the two off-curve points on either side. It is not always easy to keep an outline smooth around on-curve points. Fortunately there is a command that will do just that. Right-click one or more on-curve points, which are surrounded by off-curve points, and select Smooth Curves. If no points are selected it will apply to all points. This feature will only work if the on-curve point is already close to smooth.
Tip: There is also an access key “S” to smooth curves.
There is an additional Smooth and Align Curves, which in addition to smooth curves will also either vertically or horizontally align the related points, if they are already close to vertical or horizontal.
Tip: There is also an access key “D” to smooth curves and align points.
Round XY Coordinates
While editing glyph outlines the contours might have been moved or scaled which can result in points with where the X and/or Y value of the coordinate has become a floating-point number. On export FontCreator will always round to the nearest integer. Right click and select Round XY Coordinates if you want to round coordinates values while designing your outlines.
Extend Corner
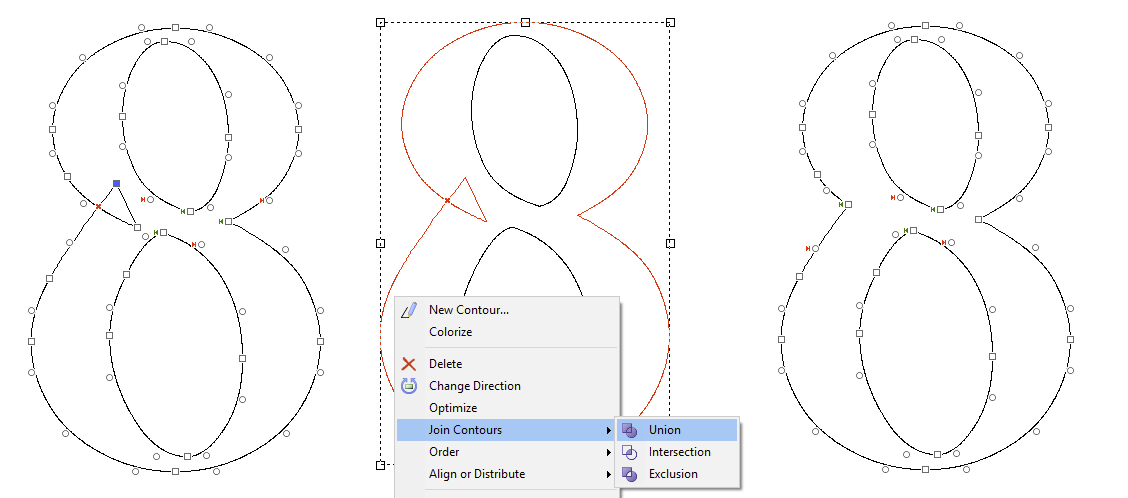
The Extend Corner feature allows you to make changes to a contour segment without interfering with the other side of the corner. To use it, select one or more corner points, right-click and select Extend Corner. Extend Corner works on corner points only; selected smooth points are skipped.
At an outer corner the extended segments cross each other outside the shape and leave a small loop. In a font with a single master such a loop is not drawn as ink: the editor shows it only in the gray outline, and Remove Overlap removes it. A font with more than one master keeps the loop, so its masters stay compatible. Exported static fonts never contain it, also when they come from a font with several masters. A loop counts as small when it reaches no further than 8% of the em (at least 60 funits) along each of its two segments; a larger loop stays ink.
The screen shots below show how a curve is changed with help of Extend Corner and Join Contours.