Introduction
MainType uses a database and a vault to store font information, which allows for fast access to your fonts. The font manager comes with a utility (FmsConfig) to make and restore backups.

The user interface contains several panels, that you can move, reposition, resize, and even hide to your liking. When you have all panels in place for a specific task, do save the layout so that you can easily switch between specific layouts as needed.
The font list shows the fonts based on the selected view or group. When the Active Fonts view is selected, it will show all active fonts. Active fonts are either installed or loaded, thus available to all applications. The toolbar contains a Preview Text combo box through which you can change the text shown in the “Preview” column.
By default, MainType displays thirteen columns in the fonts panel. If you right-click on any column header you can change the visibility of the columns and restore them to their original size. If the name of a column is checked, it will appear in the panel.
Add Fonts to MainType
MainType will automatically detect all installed fonts, but you need to tell where to look for more fonts on your system. To add fonts to your MainType font library, select Library from the main menu, and then click Add Font Folder. Click the Browse button to select a folder that contains (part of) your font collection.

If you want to maintain groups within MainType, we recommend to create groups. If you prefer the way your fonts are organized on your file system, then it is best to use “Keep in sync” folders.
OpenType Layout Features
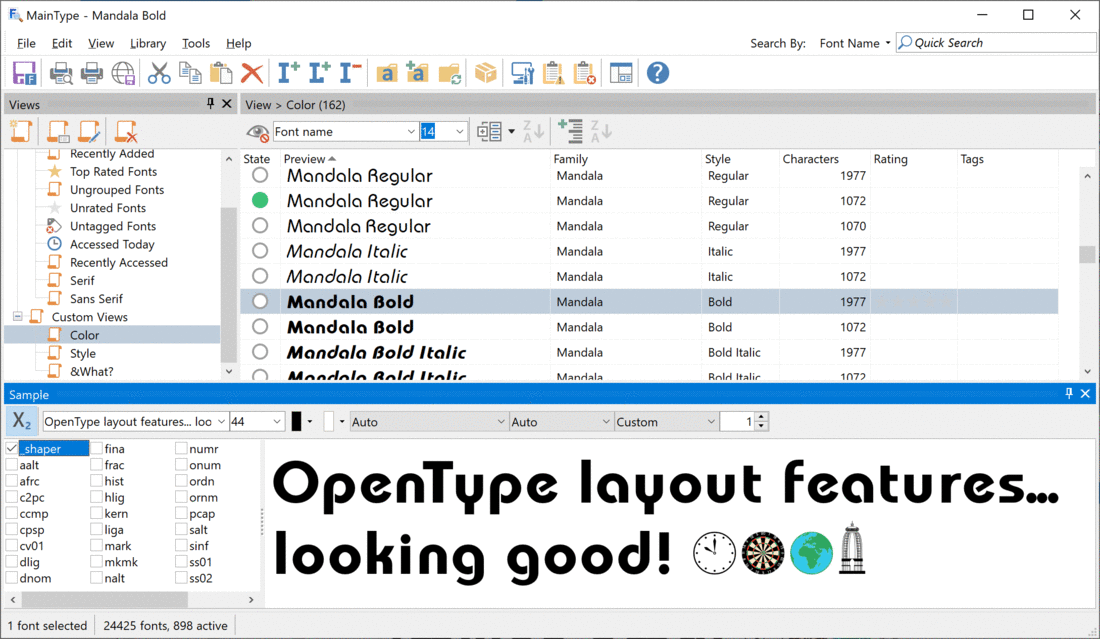
Use the Sample panel to select which features you want to apply to the preview text, so that you can test a font’s OpenType layout features directly in MainType. To enable this mode, click the X2 button. As a bonus it also supports color fonts!
Font Tags

Use the Tag Search panel to find fonts based on one or more tags. To begin a search, simply click on one of the balls in front of the tags.

Character Grid Panel
The character grid shows all characters available in the selected font. For your convenience, the characters are grouped into Unicode blocks. This panel also allows you to view all glyphs. To enable this, click the "Unicode" button on the toolbar.

Right-click a character, to copy it to the clipboard, so you can paste it in other software, like a Word document, Cricut, InDesign, etc.
Feedback
Your feedback, suggestions for improvements, and questions related to this and other tutorials are welcome; please post them to the High-Logic Font Forum.
